
Planting the Seeds of Success: A Comprehensive Guide to Starting Seed Trays and Cultivating Your Dream Garden
Think you can take your green thumb to the next level? It's great that you thought so! I have just the right place for you. Even if you were experienced gardener before or you are just turning your hands to this, this is a good place to read about starting a seed tray. Starting from picking the best variety of seeds and continuing with plantings, we will give you instructions in a detailed manner.
At the end of this guide you will be able to achieve seemingly complex tasks thanks to the authoritative advice, useful information, and step-by-step instructions provided. With the right tools, you will be able to begin your gardening trip. Put on your gardening gloves and embed yourself in an exciting journey of cultivating plants from scratch.
Benefits of starting seeds in trays
Starting seeds in trays is a popular and effective method for home gardeners. It offers several benefits that can help you achieve gardening success. First and foremost, starting seeds in trays allows you to have greater control over the growing conditions. By starting indoors, you can provide a controlled environment with optimal temperature, moisture, and light levels. This ensures that your seeds have the best chance of germinating and growing into healthy seedlings.
Another advantage of using seed trays is that it allows for early planting. By starting your seeds indoors, you can get a head start on the growing season. This is especially beneficial for gardeners in regions with short growing seasons or unpredictable weather. Starting seeds in trays also gives you the opportunity to extend your gardening season by starting seeds for fall crops while still harvesting from your summer garden.
Additionally, starting seeds in trays provides a cost-effective way to grow a wide variety of plants. Buying seedlings from nurseries can quickly add up, but starting your own seeds allows you to save money and have control over the selection of plants. You can choose from a vast range of seeds, including heirloom varieties and unique or exotic plants that may not be readily available as seedlings.
Essential tools and materials for seed tray gardening
To get started with seed tray gardening, you'll need a few essential tools and materials. Here's a list of what you'll need:
Seed trays or containers: Choose trays or containers that are at least 2-3 inches deep and have drainage holes at the bottom. These can be plastic or biodegradable options.
Seed starting mix: Use a high-quality seed starting mix that is lightweight, well-draining, and sterile. Avoid using regular garden soil, as it may contain pathogens or be too heavy for seedlings.
Seeds: Select seeds based on your gardening goals and preferences. Consider factors such as plant type, maturity time, and growing conditions. It's always a good idea to choose seeds from reputable sources.
Labels and markers: Labeling your trays is essential for keeping track of the seeds you've sown. Use waterproof labels or markers to avoid smudging or fading.
Watering can or spray bottle: A watering can with a fine rose or a spray bottle can be used to water your seedlings gently. This helps prevent overwatering and disturbs the delicate seedlings less.
Grow lights or natural light: Adequate lighting is crucial for healthy seedling growth. If you don't have access to sufficient natural light, consider using fluorescent or LED grow lights.
Heat mat (optional): For seeds that require warmer temperatures for germination, a heat mat can be used to provide consistent warmth.
Plastic dome or plastic wrap: A plastic dome or plastic wrap can create a mini greenhouse effect, helping to retain moisture and heat during the germination process.
Choosing the right seeds for your garden
Choosing the right seeds is an exciting part of starting seed trays. It's essential to select seeds that are suitable for your garden's growing conditions and your preferences. Here are some factors to consider when choosing seeds:

Plant type: Decide whether you want to grow vegetables, herbs, flowers, or a combination. Consider the space you have available and the purpose of your garden, whether it's for fresh produce, ornamental beauty, or a mix of both.
Maturity time: Look for seeds that have an appropriate maturity time for your growing season. Some plants, like tomatoes or peppers, may require a longer growing season, while others, like lettuce or radishes, can be harvested relatively quickly.
Growing conditions: Consider the environmental conditions in your garden, such as sunlight exposure, soil type, and average temperature. Choose seeds that are suitable for your specific climate and growing conditions.
Variety: Explore different varieties of plants to add diversity and excitement to your garden. Heirloom varieties can offer unique flavors and characteristics, while hybrid varieties may provide increased disease resistance or higher yields.
Seed quality: Purchase seeds from reputable sources to ensure good germination rates and reliable genetics. Look for seeds that have been tested for germination percentage and packaged for the current year.
Personal preferences: Don't forget to consider your personal preferences when selecting seeds. Choose plants that you enjoy eating, smelling, or looking at. Gardening should be enjoyable, and growing plants you love will make the experience even more rewarding.
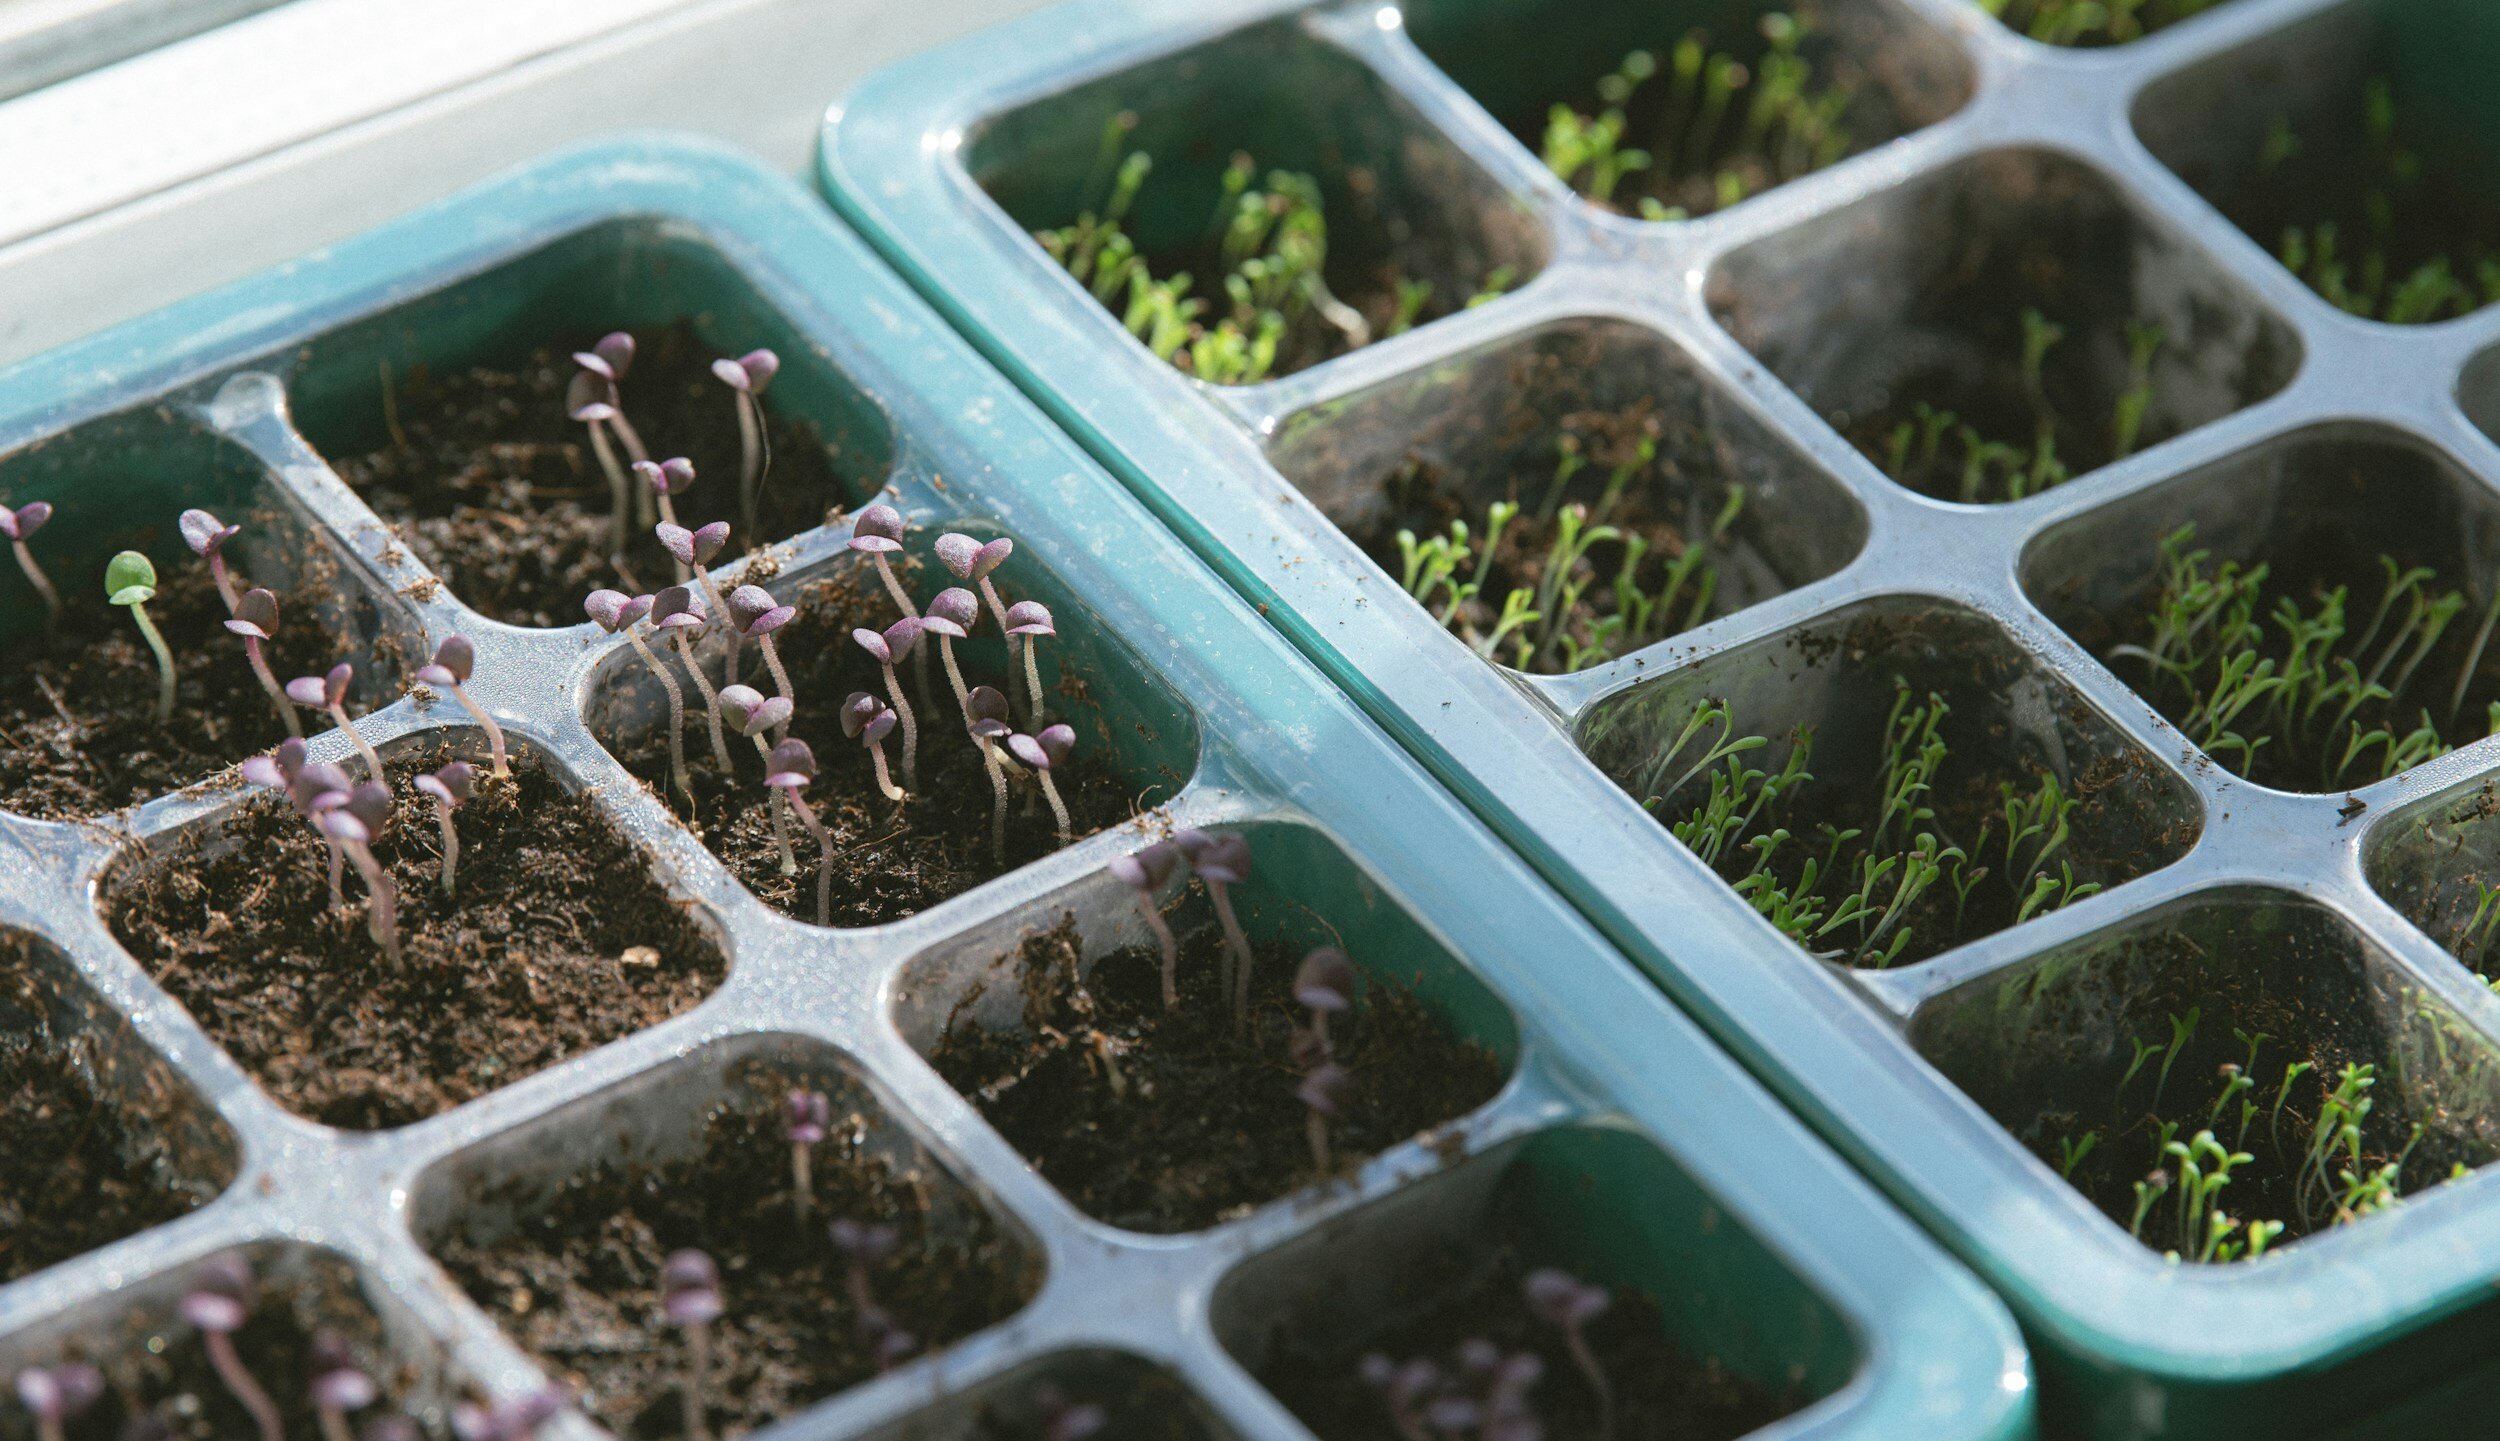
Preparing and filling seed trays
Now that you have your tools, materials, and seeds ready, it's time to prepare and fill your seed trays. Proper preparation and filling of seed trays are crucial for the success of your seedlings. Here's a step-by-step guide to help you get started:

Clean and sterilize: Clean your seed trays thoroughly with warm soapy water to remove any dirt or residues. Sterilize them by soaking in a solution of 1 part bleach to 9 parts water for about 10 minutes. Rinse well and let them air dry.
Fill trays with seed starting mix: Fill each seed tray cell or container with the seed starting mix, leaving a small gap at the top for watering. Gently tap the tray on a flat surface to settle the mix and remove any air pockets.
Moisten the mix: Before sowing your seeds, moisten the seed starting mix evenly. Use a spray bottle or a gentle shower from a watering can to avoid disturbing the mix.
Sow seeds: Follow the instructions on the seed packet for the appropriate sowing depth and spacing. Make small indentations or use a dibber to create holes for the seeds. Place one or two seeds in each hole and cover them with the recommended amount of seed starting mix.
Label trays: Label each tray with the name of the plant and the date of sowing. This will help you keep track of your seedlings' progress and identify them as they grow.
Cover trays: Place a plastic dome or loosely cover the trays with plastic wrap to create a humid environment that aids in germination. Remove the cover once the seedlings emerge.
Provide proper lighting: Place the trays in a location with bright, indirect light or under grow lights. Adjust the height of the lights to ensure they are 2-4 inches above the seedlings to prevent stretching.
Watering: Keep the seed starting mix consistently moist, but not soggy. Water gently to avoid displacing the seeds or damaging the emerging seedlings. Use a spray bottle or a fine rose on a watering can to water from the bottom or mist the soil surface.
Maintain temperature: Most seeds germinate best at specific temperatures. Refer to the seed packet or gardening references to determine the ideal temperature range for your seeds. Use a heat mat if necessary to provide consistent warmth.
Monitor and wait: Check your trays daily for signs of germination. Once the seedlings emerge, remove the cover and continue to provide proper care and maintenance.
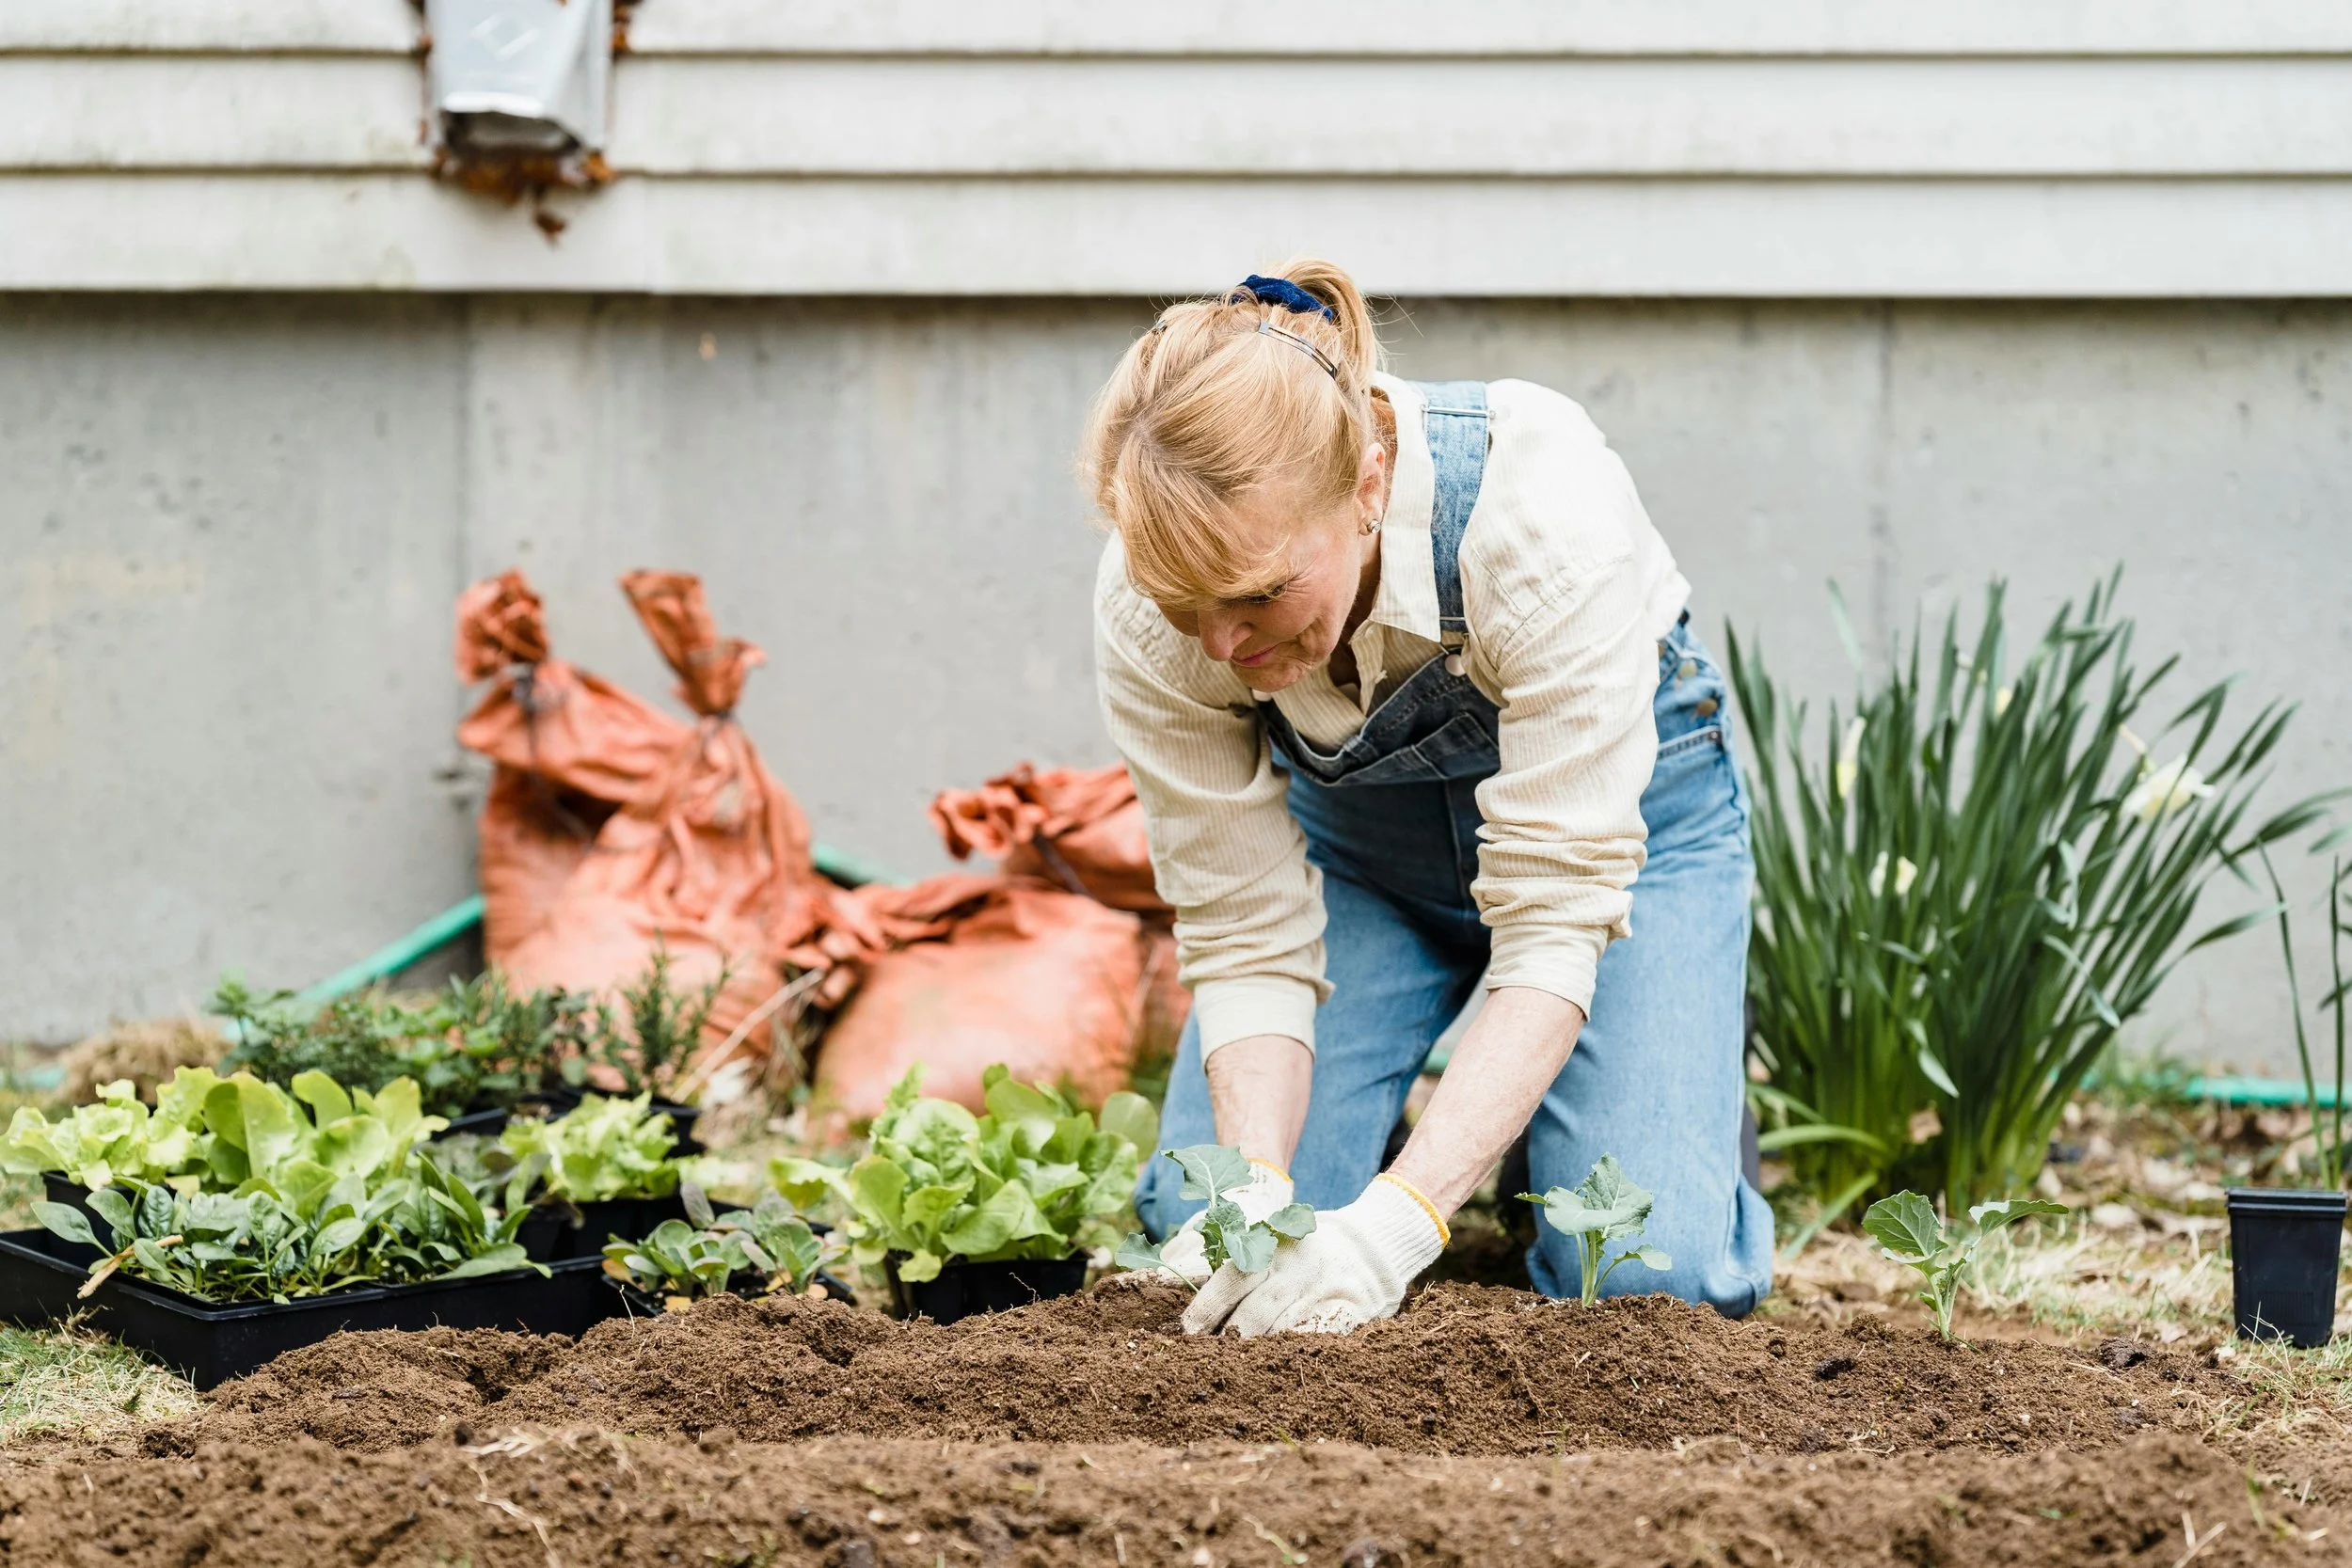
Transplanting seedlings to the garden
Once your seedlings have grown strong and the risk of frost has passed, it's time to transplant them into your garden. Follow these steps to ensure a successful transition:
Choose the right time: Check the recommended planting time for each type of seedling. Some plants can tolerate cooler temperatures, while others require warmer conditions. Transplant on a cloudy day or in the early morning or late evening to minimize stress on the seedlings.

Prepare the garden bed: Clear the area of weeds, rocks, and debris. Amend the soil with organic matter if needed and ensure proper drainage.
Harden off seedlings: Gradually expose your seedlings to outdoor conditions over a week. Start with a few hours of outdoor exposure in a sheltered location, gradually increasing the time and exposure to direct sunlight.
Dig holes: Dig holes in the garden bed that are slightly larger than the root ball of each seedling. Space the holes according to the recommended spacing for the specific plants.
Transplant seedlings: Gently loosen the root ball of each seedling and carefully lift it from the seed tray. Place the seedling in the prepared hole, making sure the top of the root ball is level with the soil surface. Backfill the hole with soil, firming it gently around the seedling.
Mulching: Apply a layer of organic mulch around the base of the seedlings to help retain moisture, suppress weeds, and regulate soil temperature.
Stake or support: Some plants may require staking or support to prevent them from toppling over. Install stakes or cages when transplanting to avoid damaging the roots later.
Monitor and maintain: Continue to monitor your transplanted seedlings for any signs of stress, pests, or diseases. Provide proper care, including watering, fertilizing, and pruning, as needed.
Troubleshooting common seed tray issues
While seed tray gardening is relatively straightforward, you may encounter some common issues along the way. Here are a few troubleshooting tips to help you overcome these challenges:
Damping-off: Damping-off is a fungal disease that can cause seedlings to wilt and collapse. To prevent damping-off, ensure proper air circulation, avoid overwatering, use sterile seed starting mix, and keep your trays clean.
Leggy seedlings: Leggy seedlings are tall, thin, and weak due to insufficient light. If your seedlings are leggy, increase the amount of light they receive or adjust the height of your grow lights to ensure they are 2-4 inches above the seedlings.
Yellowing leaves: Yellowing leaves can be a sign of nutrient deficiencies or overwatering. Check the soil moisture levels, adjust your watering practices, and consider using a balanced liquid fertilizer to provide the necessary nutrients.
Seedlings not emerging: If your seedlings fail to emerge, it could be due to old or poor-quality seeds, incorrect sowing depth, or unsuitable temperature conditions. Check the seed packet for specific instructions and consider re-sowing with fresh seeds if necessary.
Pests: Keep an eye out for common garden pests such as aphids, spider mites, or snails. Remove pests by hand or use organic pest control methods, such as insecticidal soap or neem oil.
Fungal diseases: Fungal diseases like powdery mildew or leaf spot can affect seedlings. Ensure proper air circulation, avoid overhead watering, and use appropriate fungicides if necessary. Remove and destroy severely infected seedlings to prevent the spread of the disease.
Advanced techniques for successful seed tray gardening
Precision Sowing: Use tools like seed tape, seed dibbers, or vacuum seeders for precise seed placement. This ensures proper spacing and reduces the need for thinning, promoting healthier seedlings.
Customized Growing Medium: Tailor your growing medium by incorporating amendments like perlite, vermiculite, or coconut coir to improve aeration, drainage, and water retention. Experiment with different ratios to optimize the mix for specific plant types.
Microclimate Control: Create microclimates within your growing area by using cloches, row covers, or mini-greenhouses. These structures provide protection from adverse weather conditions, pests, and fluctuations in temperature, fostering optimal growth conditions for seedlings.
Hydroponic Seed Starting: Explore hydroponic seed starting systems such as nutrient film technique (NFT) or deep water culture (DWC). Hydroponics can offer precise control over nutrient delivery, oxygenation, and hydration, resulting in faster germination and healthier seedlings.
Root Zone Heating: Install heating cables or mats beneath seed trays to provide consistent bottom heat. Warm soil temperatures promote faster germination and root development, especially for heat-sensitive crops or in cooler climates.
Advanced Lighting Systems: Upgrade to high-quality LED grow lights with adjustable spectra and intensity levels. Tailor the light spectrum to match each stage of plant growth, optimizing photosynthesis and minimizing energy consumption.
Automated Irrigation: Implement drip irrigation or automated watering systems with programmable timers. Consistent moisture levels are crucial for seed germination and seedling growth, and automation ensures precise control without the risk of over or underwatering.
Supplemental CO2 Enrichment: Introduce carbon dioxide (CO2) supplementation in enclosed growing spaces to enhance photosynthesis and accelerate growth rates. Controlled CO2 levels can boost plant productivity, especially in low-CO2 environments or during periods of low light.
Bio-Stimulants and Beneficial Microbes: Incorporate organic bio-stimulants, mycorrhizal fungi, or beneficial bacteria into your seed starting regimen. These products can improve nutrient uptake, enhance disease resistance, and promote overall plant vigor.
Vertical Growing Systems: Utilize vertical growing systems or shelving units to maximize space efficiency in limited growing areas. Vertical gardening allows you to grow a larger number of seedlings in a smaller footprint while facilitating better airflow and light penetration.
Data-driven Analysis and Optimization: Keep detailed records of key metrics such as germination rates, growth rates, and environmental parameters. Analyze this data to identify trends, patterns, and areas for improvement, allowing you to refine your techniques and achieve better results with each growing cycle.
Through the comprehensive techniques outlined in this guide, you have the tools and knowledge to embark on a journey of nurturing and cultivating vibrant, healthy seedlings. By implementing precise sowing methods, optimizing growing conditions, and leveraging advanced strategies, you can maximize germination rates, promote robust growth, and ultimately harvest the fruits of your labor. As you apply these principles and refine your approach over time, may your garden flourish with abundance, beauty, and the satisfaction of knowing that you have cultivated your own piece of paradise from humble beginnings. Happy gardening!